In last post we have created VPC, subnets-(private & public) just for starting it from scratch. now its time to create bastion box in public subnet and server in private subnet.
Lets start now create ec2 instances , go to ec2 services and launch new ec2 instance. first we will create bastion box in public subnet. For our demo we are selecting Ubuntu server 18.04 LTS , you can choose any of linux machine as per your choice.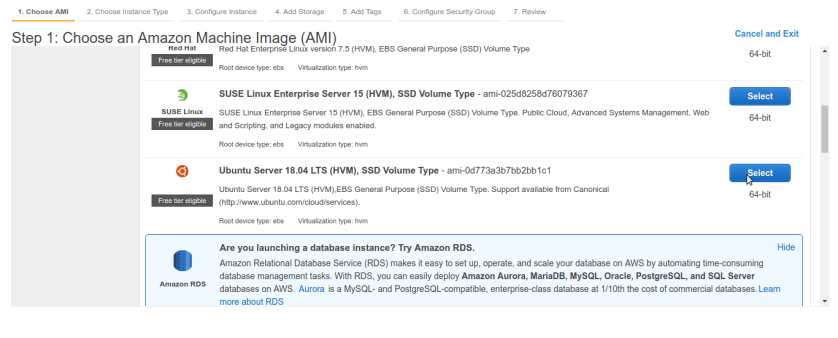
Make sure in Instance details we select our recently created VPC here its my_vpc.
and we are creating bastion box so it should be in public subnet so select public subnet.
its okey to keep other options as it is. or change it accordingly your needs like IAM access and so on. 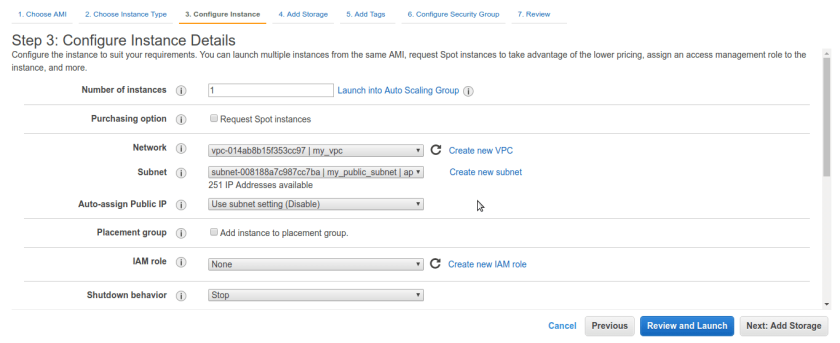
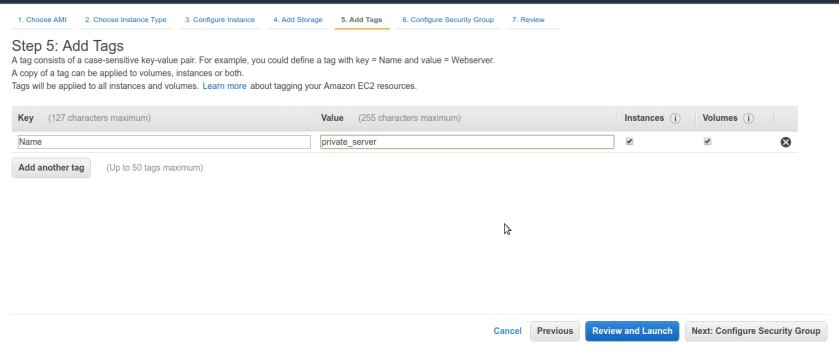
Add Name tags so we can distinguish our bastion box from other ec2 machines easily.
here we called our box “jump_box_public”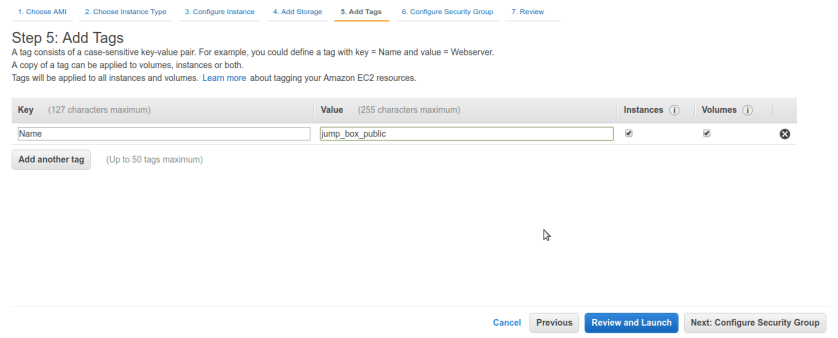
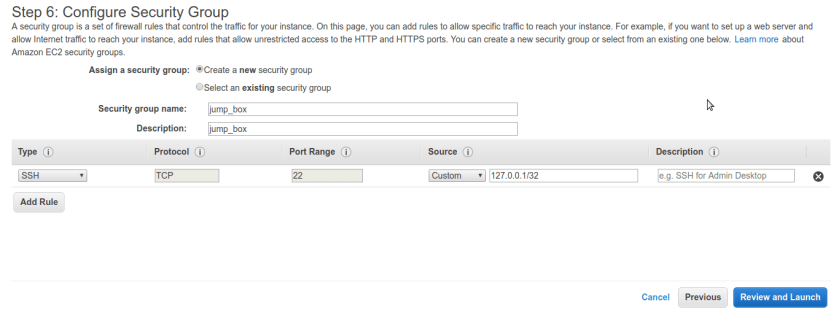
Now next step is important one configure new security group which will be just solely for jump_box only, no other machines should be added to this security group. our jump box only have one purpose for connecting internal machines so only service should be allowed is ssh port 22, make sure no other active services hosted on bastion box.
Allow ssh access to only IP address block of your administration machines. other IP’s should not have access to it. here, for demo purpose I set it to 127.0.0.0/32 you need to alter it to your own ip address block.
Now after Review and Launch step jump box should be up and running. make sure it have public ip assigned automatically if not then there might be some points missing with route table associated with public subnet or even Internet Gateway itself check for it. 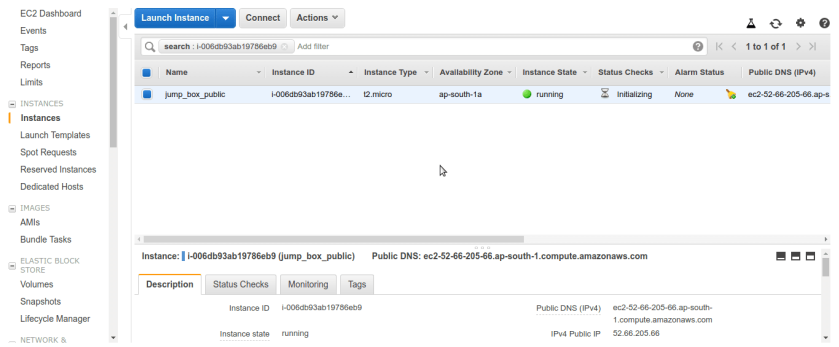
Try to ssh with jump box with keys you created, downloaded at a time of ec2 creation. In our case its working so everything is good till now.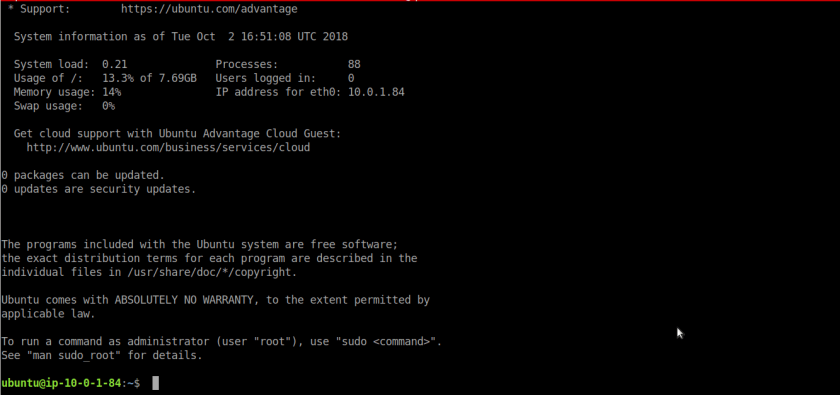
Now , bastion box is running its time to spin up internal server in private subnet. do same process go to ec2 services and launch new instance just make sure in instance details select correct VPC and private subnet only.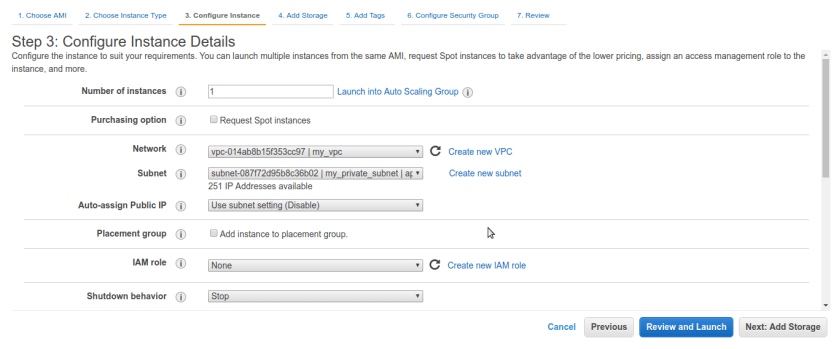
Name the server as private machine for easy identification.
Another important step is to Security group for this one as well. Create ssh port 22 rule and in source assign jump_box group rather than any ip range , if your jumpbox have elastic ip address you can enter that ip directly as well. anyhow this machine is not routable to internet so make sure only jumpbox in our VPC have access to it no other random machines or any leaked rules. 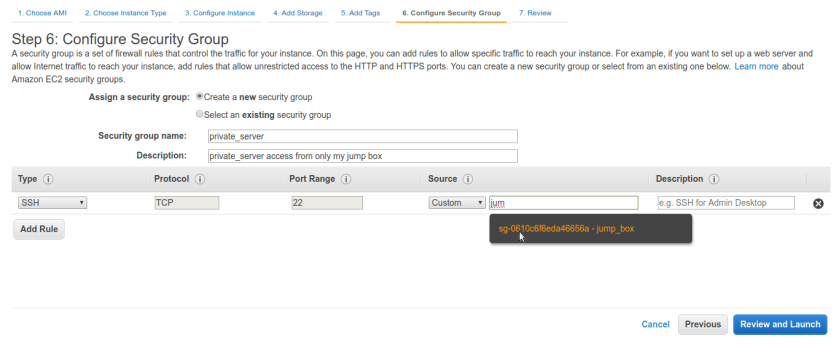
Create new ssh key-pair for private server rather than using as keys as jump box or it will be defeat whole purpose of jump box. so create new keys, store it in secure place locally with file-permissions 400.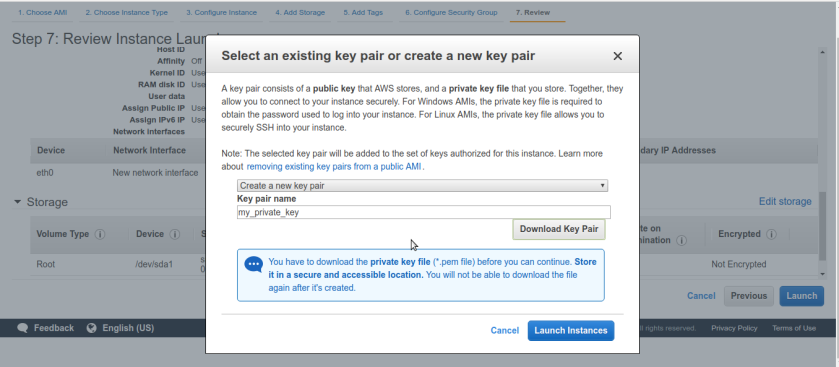
Now, both jump box and server is provisioned. its time to connect to jump box and then from there to server. our both ssh-keys are stored at local machine. we don’t want to keep any keys at jump box in case if jump box compromised then it will be easy access to servers we don’t want that. we will keep all ssh-keys securely at local machine only.
SSH agent forwarding->
we are going to use ssh-agent to load both of ssh-keys at local machine and just ssh into jump box from there to private server. install ssh-agent if you don’t it already, for windows you can use putty counter part i am not going to use it because my local machine is linux.
start ssh-agent from bash
eval "$(ssh-agent -s)
it will start agent in background now its time to add keys to agent using ssh-add command.
#ssh-add -k your_key.pem
here , we added jumpbox’s public key.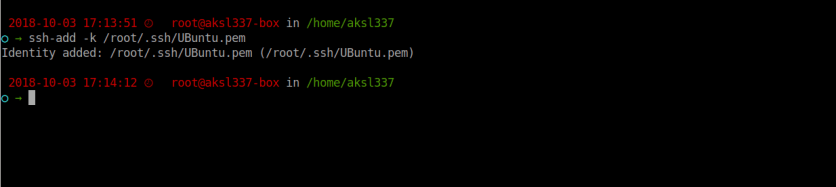
Here we are able to connect to jumpbox directly without explicitly specifying keys with -i option. so it means ssh-agent is working properly. Note: -A option with ssh command it enables ssh-forwarding.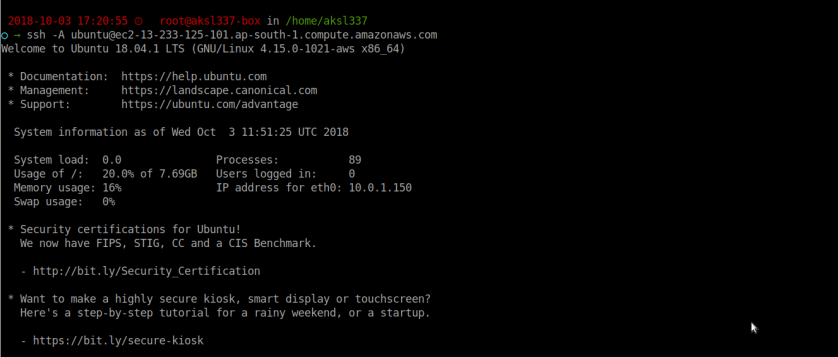
Now just for sake we tried to connect to private server directly from local machine with correct keys. see we can’t able to connect because its located in private subnet its not routable to internet. so only way we can reach it from inside VPC from jumpbox only as per security group policies.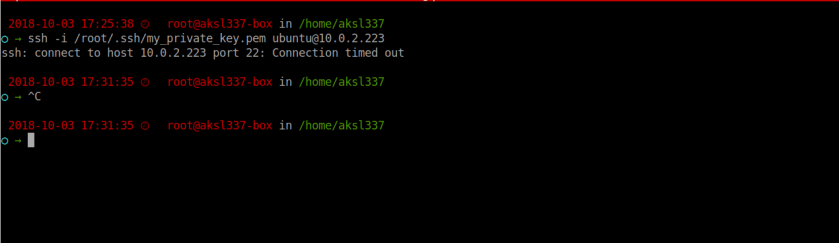
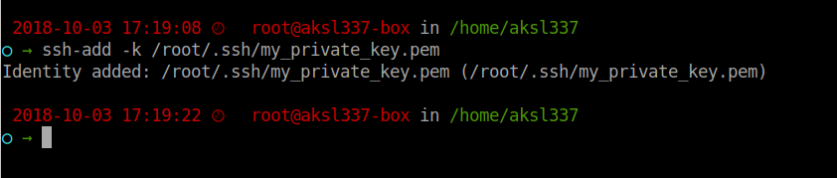
Now add private servers ssh keys to ssh agent as well using ssh-add -k key_name.pem command.
We can check all keys added to ssh-agent by #ssh-add -L command.
Now both keys are loaded and we are connected to jumpbox already in one terminal tab.
lets ssh into private server from jump box shell. note down private ip of private server from ec2 dashboard it should be non-routable ip.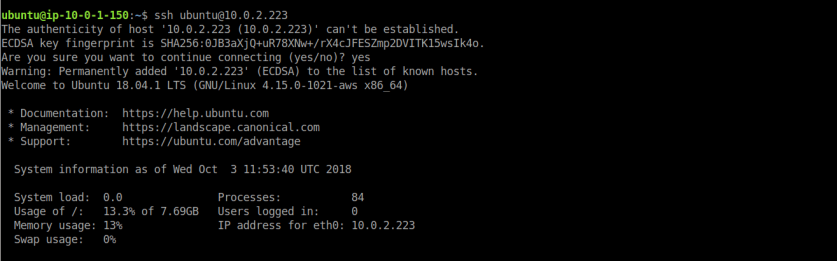
here we can see its successfully connected to private server without specifying -i option with key file name. here ssh-forwarding working in background. 10.0.1.150 is our jump box’s hostname and we connected to private server at 10.0.2.223 successfully.
Thats it, we can also use same jump box for any public facing server as well just need to setup security group of server which will allow only jump box to connect via ssh.
this is 2nd part of tutorial for first part go here-> vpc&subnet setup


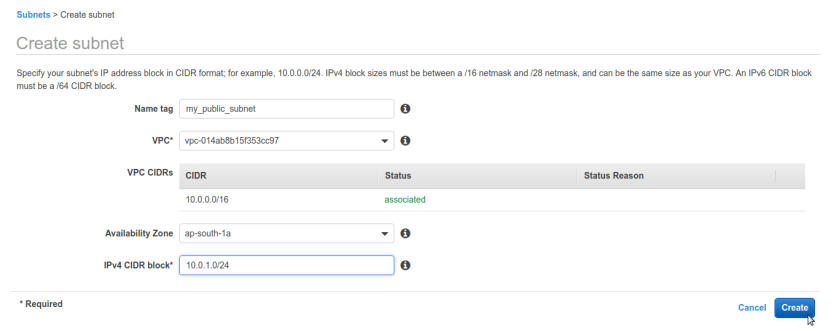
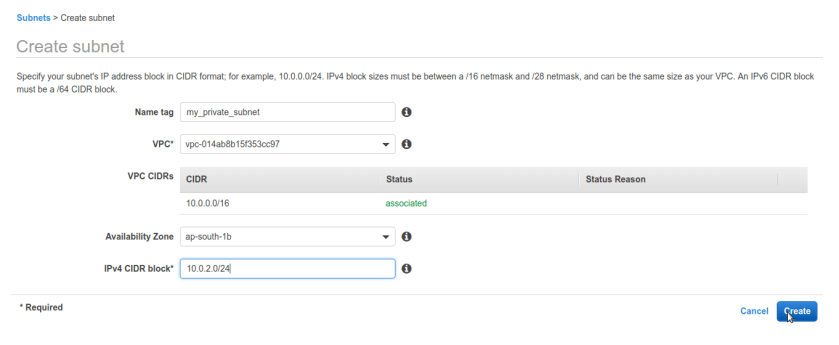 same way create public subnet with different sub-block of ip addresses here we chose 10.0.1.0/24 just for simplicity you can choose anything as long as it falls under VPC’s CIDR block.
 after that we should have our newly created subnets public & private associated with our VPC.
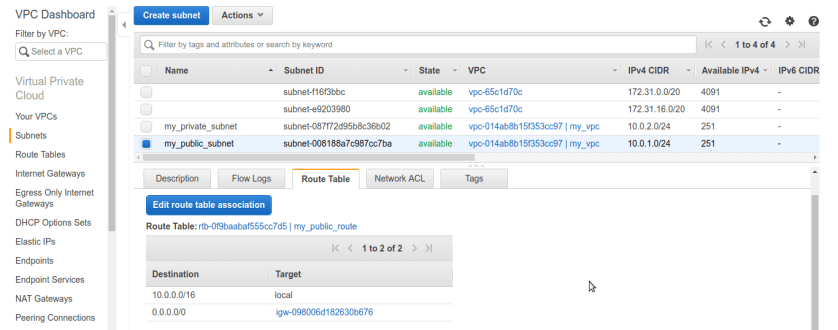
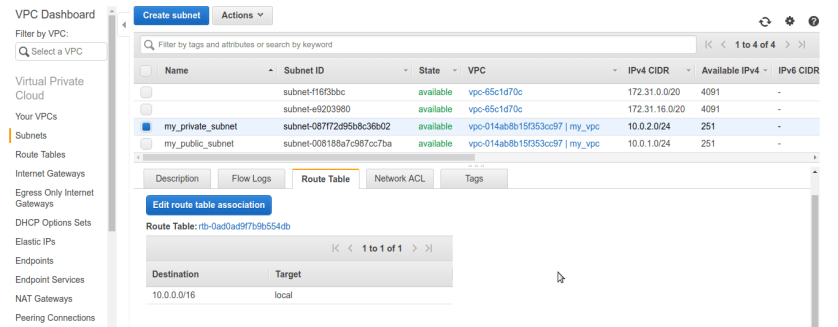
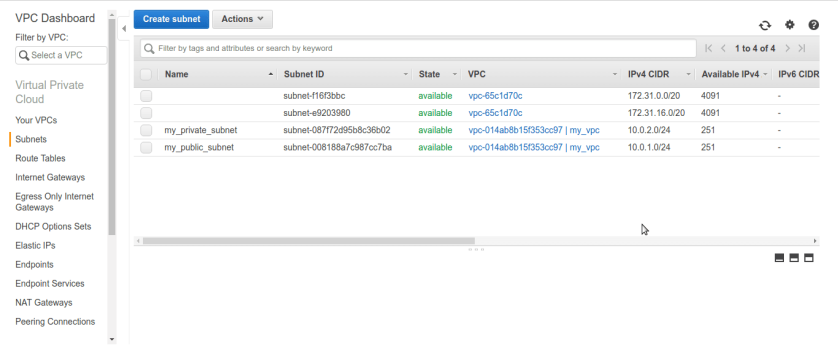 Now its time to make our public subnet public in sense of routable to internet. rememeber our VPC did not any routes to internet by default we can conform that from route tables tab selecting route-table associated with our vpc. There is only one entry for private ip-range 10.0.0.0/16 nothing else ip’s other than this range can not be routable in vpc means we cant reach internet.
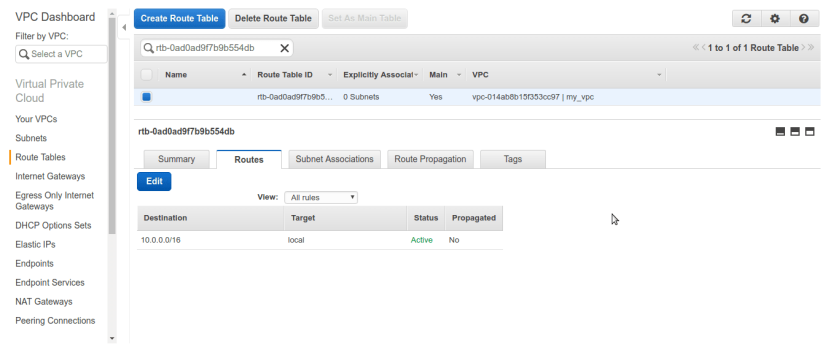 So at this stage our whole VPC containing our both subnets private & public is private only no internet access. to make our public subnet truly internet reachable and public we need to create special n/w interface in aws terminology aka Internet-Gateway. Internet-Gateway is device which will allow us to communicate to internet, it grabs public ip for us from aws and everything about IG is automatically managed by aws services under the hood once we created it and associate it with correct network,vpc or subnet. so first create one IG from left pane selecting internet gateway and create IG. we named it My-IG.
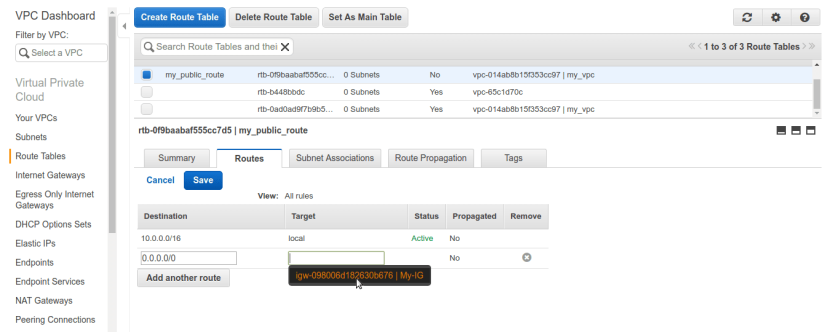
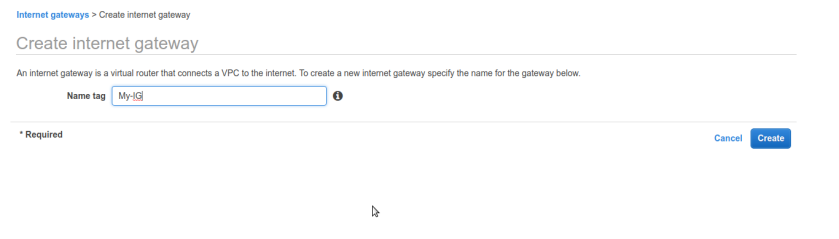 now, once IG is created we need to create new route-table solely for our public-subnet. and associate that route table to public-subnet, edit it add IG to it.
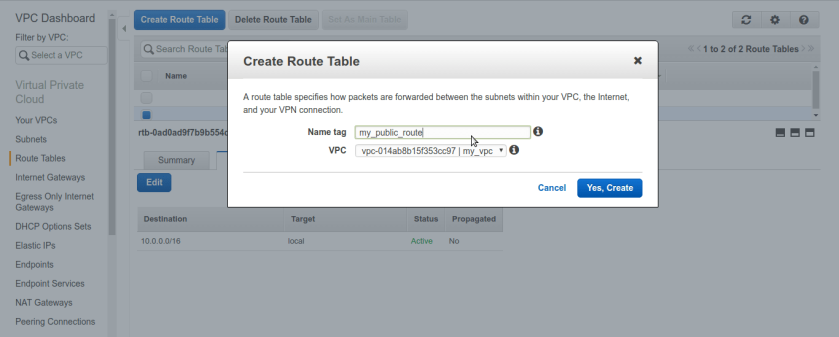
 once route table is created now go to subnets tab. we need to alter public subnets route table settings. right click public subnet and select Edit route table association. by default it will have vpc’s route table which doesn’t have IG rule in it.
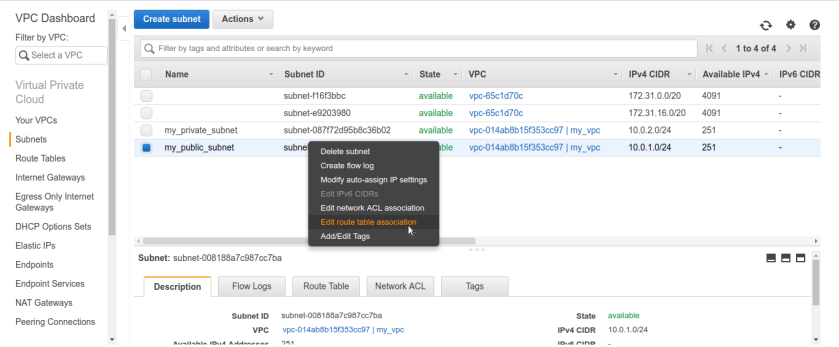 After selecting option it will be asking for route-table name make sure we select our newly created public route-table and it have IG added to it, like below.
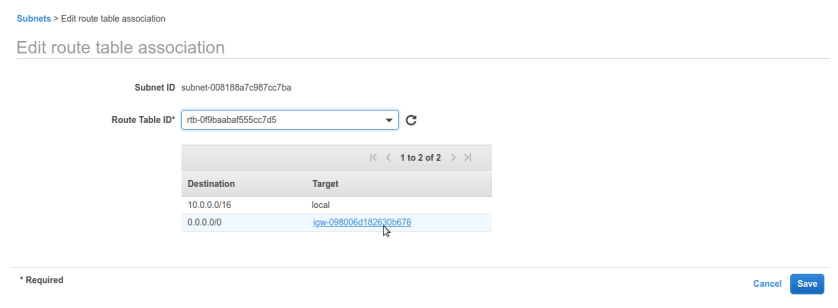 now its done. we have successfully created VPC, 2 subnets- private and public. for making public subnet internet connected created IGW (internet-gateway) and route-table. lets check subnet settings.