
In AWS cloud there are limitless possibilities for creating secure and reliable network architecture. from security point of view aws already have pretty good services to back us up.Services like security groups where we can manage host level firewall without any hassle, N/W ACL’s where we can define access control lists in stateless manner or Route table to define correct routes for machines or even entire virtual networks (VPC) but still there are some security needs when we connect ec2 machines directly from internet. they are exposed to multiple attack vectors and if its production servers then there is no need to allow whole internet to give access to management ports like ssh or RDP. so now we are going to setup Bastion Box or jumpbox which will act as middle-man when we connect to servers in private-subnets of vpc or even public subnets. BastionBox is machine we will setup for only one purpose just to jump to server machines.
BastionBox will only have access from our ip ranges to ssh/rdp port only, no other services should be hosted on this particular box. then we will make sure our servers only have ssh access allowed from bastion machine. our jumpbox is hosted in aws itself so it would be more secure to first connect to it and then from there to our servers. servers should not have any direct internet access allowed to ssh. we will do it fine-grained security-groups rules where we will only allow our jumpbox security group to get ssh. one more important point here, jumpbox security group must be associated with only jump-boxes no other machines or servers.
Lets get started , in this first part we first going to create VPC and add private and public subnets. later in 2nd part we will spin up bastion box in public subnet and server in private subnet (private subnet would not have any internet access what so ever it should only routable to aws vpc, assuming this server might be database backend server).
Creating vpc from scratch , go to aws console -> VPC section.
Thats our default vpc created by amazon by default.

Now, click on create vpc and create new vpc for our labs. make sure you name it so we can able distinguise it with other vpcs in my case name is my_vpc. make sure you select non-routable private ip range in ipv4 CIDR block , vpc will be hosted in aws network as virtual network so it will have only private ip ranges allocated. In here, we chose 10.0.0.0/16 block.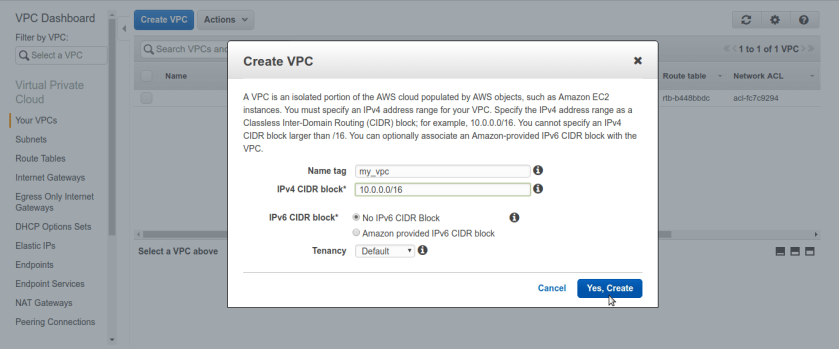
Now VPC is created we need to create subnets. one public for our bastion box and one private subnet for our internal servers. go to subnets tab from left pane , here we can see default subnets or any you already created.

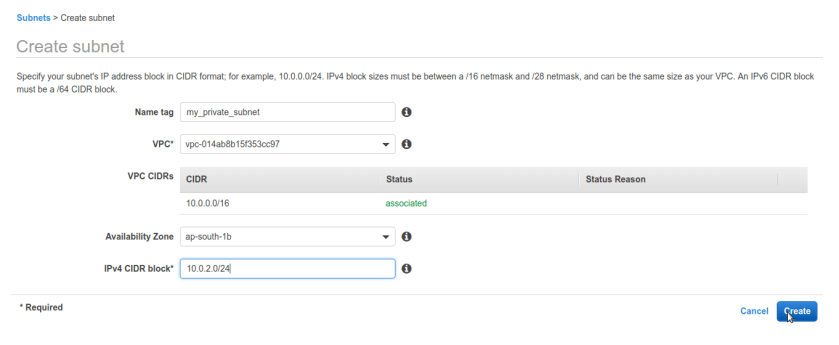
click on create subnet and create subnet, name it private and public respectively. here make sure we select exact same vpc from drop down we have created and for last option CIDR block its asking for sub block out of VPC CIDR ip range so we have 10.0.0.0/16 for our vpc. we are selecting sub block of 10.0.2.0/24 for our private subnet.
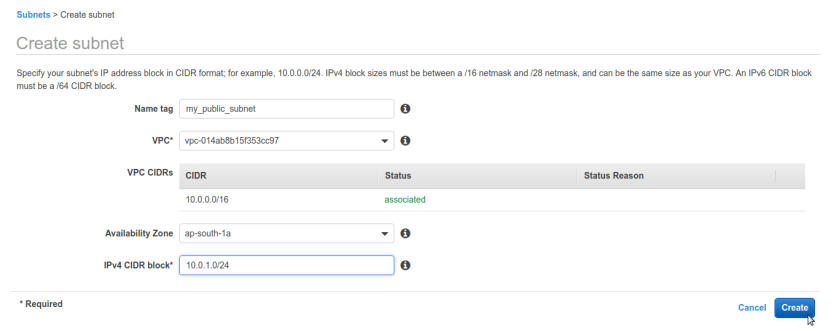
 same way create public subnet with different sub-block of ip addresses here we chose 10.0.1.0/24 just for simplicity you can choose anything as long as it falls under VPC’s CIDR block.

 after that we should have our newly created subnets public & private associated with our VPC.
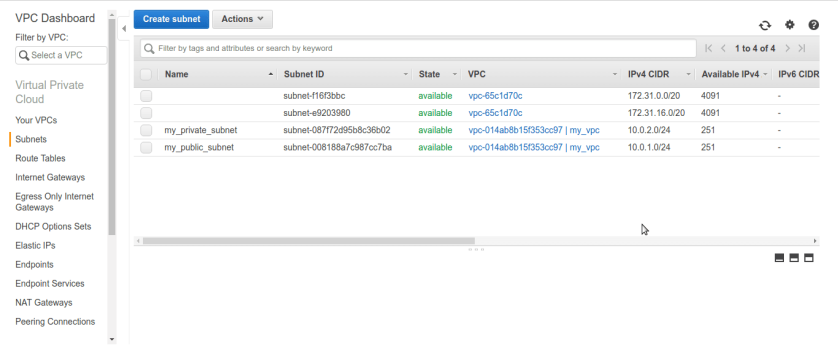 Now its time to make our public subnet public in sense of routable to internet. rememeber our VPC did not any routes to internet by default we can conform that from route tables tab selecting route-table associated with our vpc. There is only one entry for private ip-range 10.0.0.0/16 nothing else ip’s other than this range can not be routable in vpc means we cant reach internet.
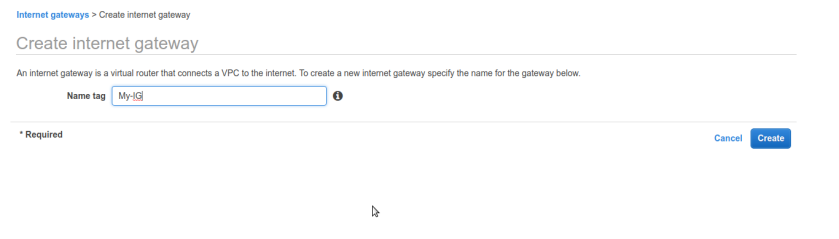
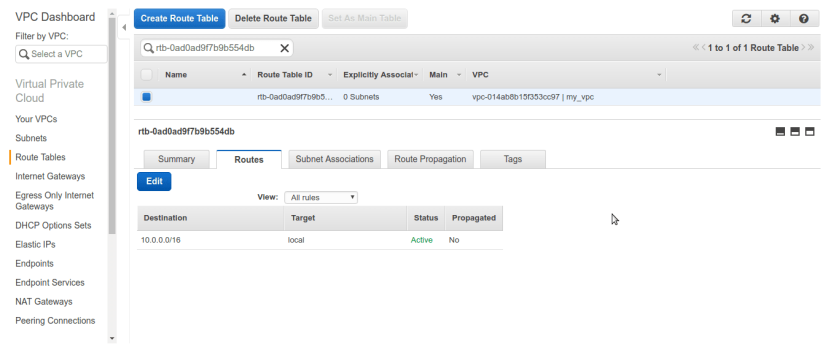 So at this stage our whole VPC containing our both subnets private & public is private only no internet access. to make our public subnet truly internet reachable and public we need to create special n/w interface in aws terminology aka Internet-Gateway. Internet-Gateway is device which will allow us to communicate to internet, it grabs public ip for us from aws and everything about IG is automatically managed by aws services under the hood once we created it and associate it with correct network,vpc or subnet. so first create one IG from left pane selecting internet gateway and create IG. we named it My-IG.
 now, once IG is created we need to create new route-table solely for our public-subnet. and associate that route table to public-subnet, edit it add IG to it.
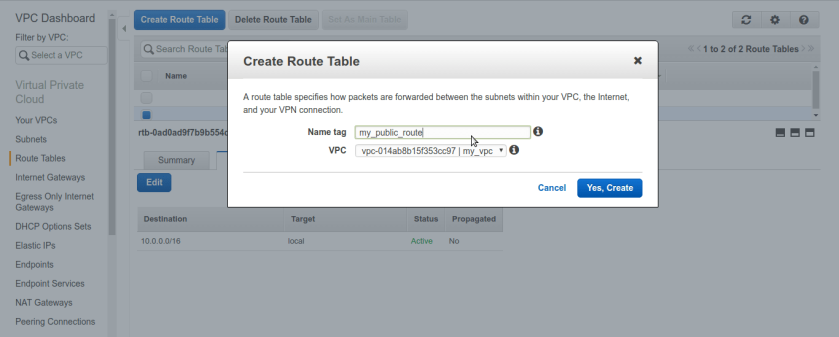
go to route-tables pane from left panel and create new route-table, select our VPC particularly.
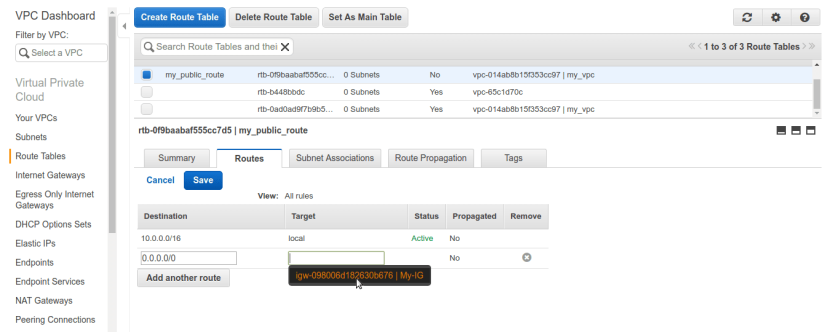
Now, from route-tables select our freshly created public route-table and add new rule to routes tab, set destination to be 0.0.0.0/0 means any internet routable ip and target textbox should be our newly created Internet-Gateway, it will automatically pop up once we click in target textbox but still make sure its correct one we have created because aws tend to pop up all of available, applicable targets(network devices).
 once route table is created now go to subnets tab. we need to alter public subnets route table settings. right click public subnet and select Edit route table association. by default it will have vpc’s route table which doesn’t have IG rule in it.
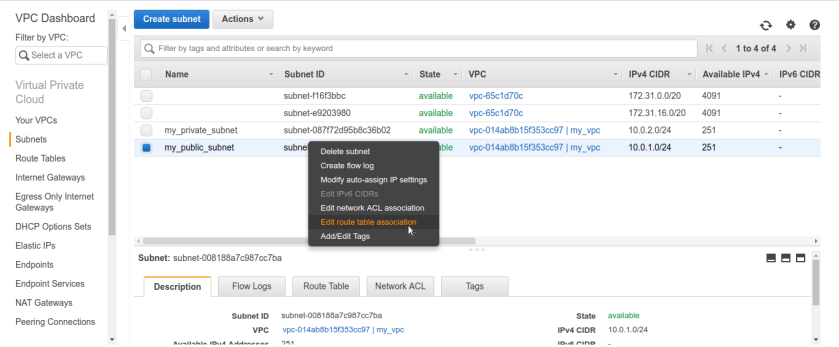 After selecting option it will be asking for route-table name make sure we select our newly created public route-table and it have IG added to it, like below.
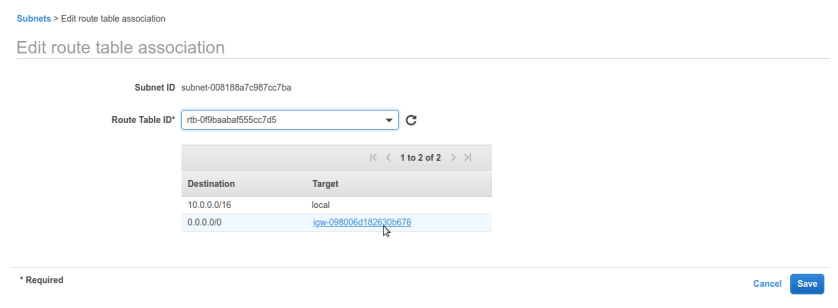 now its done. we have successfully created VPC, 2 subnets- private and public. for making public subnet internet connected created IGW (internet-gateway) and route-table. lets check subnet settings.
see private subnet doesn’t have IGW associated in route-table only have local route for subnet, good that’s what we wanted. 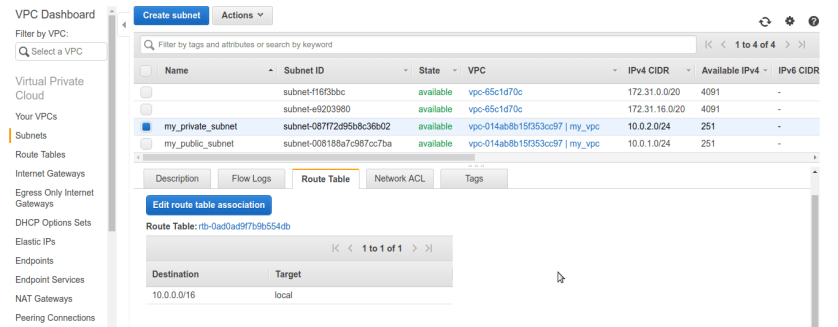
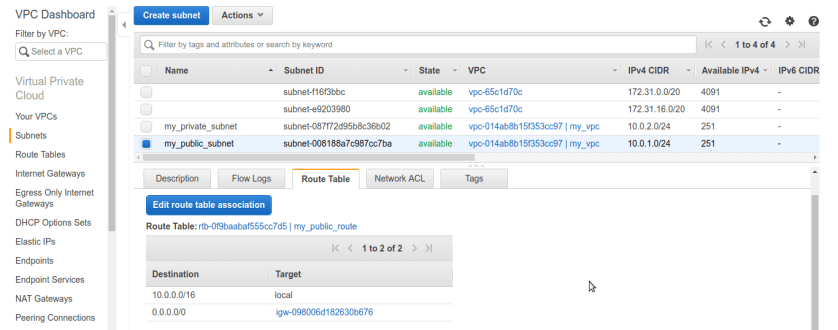
Now in subnets tab, select public subnet and see route table. sure enough it have local subnet associated with it as well as internet gateway. so its public now.
Thats it for this one, in next part we will create bastion box in public subnet and backend server in machine private subnet.
next part https://linuxg33ks.wordpress.com/2018/10/05/setting-up-bastion-box-part2-final-boxes-up-and-running/

Hi, yes this article is really good and I
have learned lot of things from it regarding blogging. thanks.
LikeLike